STEM
Using Micro:Bit for Rocketry: Experiential Learning (MoonHack)
Artash Nath (Grade 6) and Arushi Nath (Grade 3) We love Space, Robots and Rockets. As a part of the MoonHack 2018 Challenge we wrote this article to spread our […]
 HotPopRobot
Space – Science – Robots
Artash Nath (Grade 6) and Arushi Nath (Grade 3) We love Space, Robots and Rockets. As a part of the MoonHack 2018 Challenge we wrote this article to spread our […]
Artash Nath (Grade 6) and Arushi Nath (Grade 3)
 We love Space, Robots and Rockets. As a part of the MoonHack 2018 Challenge we wrote this article to spread our joy and learnings about space exploration while experimenting with Micro:bit for model rocketry.
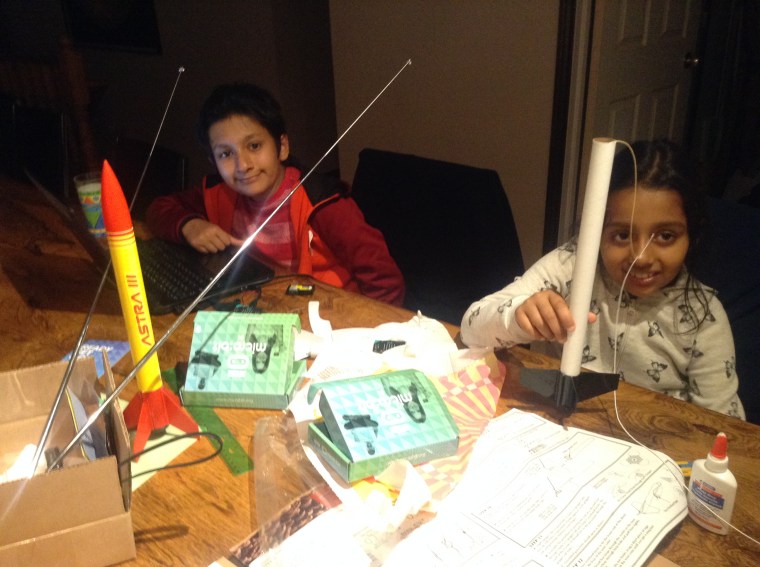
We are deeply interested in building and launching model rockets. Recently we made four model rockets and launched them successfully. We wanted to go further and get data from our rockets (similar to rockets launching from the Kennedy Space Centre!), namely how high it flew, flight time, acceleration, direction, parachute ejection time, and even videos from the rocket.
Micro:Bit Advantages for Rocket Telemetry

The easiest way to get started was to use micro:bit. A micro:bit is non-metallic and light weight hardware. It has an inbuilt accelerometer and magnetic compass (in addition to temperature and light sensors). We could use it to get acceleration of the rocket and estimate how much the rocket spins during the flight.
We also wanted our base station to get live data from the rocket. And micro:bit could make this possible as two micro:bit are able to communicate with each other.
The central processor unit (CPU) or the microprocessor on the micro:bit is a Nordic Semiconductor nRF51822. This chip contains a built-in 2.4GHz radio module. This radio can be programmed to run the Bluetooth protocol. But it is much simpler to programme them into an operation mode that allows simple, direct micro:bit to micro:bit communication. We selected this mode so that one micro:bit can act as a Transmitter and the other as a Receiver.
We tested the 2 micro:bit in an open field. We found out that we could get wirelessly transmit data between the 2 micro:bit without loss/ interruption for up to 120 meters in the line of sight. The higher we put the receiver micro:bit the better was the range. The model rockets go much higher so the micro:bit will not be able to transmit data during the entire flight path but could be useful for collecting data during the launch and possibly the descent phase.
Programming using Micro:bit

We used 2 micro:bits. One of them would fly on the model rocket and take accelerometer and compass readings. It would then transmit the data to the second micro:bit which would print the data on a serial monitor. The logic behind the code was fairly simple but the coding was a bit challenging because it was the first time we worked with the micro:bit radio.
The first part of the code was to set the transmission power for the radio to the maximum value: 7. It will allow it to transmit data the most distance possible.
We then set the micro:bit channel. This step is common for both the micro:bits. There are 256 channels for micro:bit radio. To communicate both micro:bit should operate on the same channel else they will not be able to send/ receive data between each other.
For the transmitter micro:bit, we programmed them to collect data from the accelerometer and the compass. It was important to convert this data into strings, place them in comma separated values (CSV) format, and then send them over radio. This was the most challenging part of the programming. Putting the data into CSV format is helpful as it is easy to analyse and interpret this data using common software, including excel.
The final step was to programme the receiving micro:bit to print our the data it receives from the first transmitting micro:bit onto the serial monitor.
Fixing Micro:Bit on Rockets
Micro:bit have an X, Y and Z direction which provides reference to the acceleration data being collected by it. It is important to note down the direction in which we are affixing the micro:bit to the model rocket so that we can analyse the data correctly. The micro:bit should not be placed diagonally or slanted as it will become very challenging to interpret the data.
We learnt through experimentation that it is much easier to tape the micro:bit to the rocket with masking tape because it comes out easily. While putting the masking tape, you have to make sure it does not cover the small antenna printed on to the corner of the micro:bit. If the antenna is covered it would drastically remove the range of transmission.
Care should be taken to not tape the micro:bit on top of the sleeve (the launch lug) on the side of the rocket. Else it would not allow the launch rod on the launch pad to fit into the sleeve or it would increase friction during the launch.

We replaced the AAA batteries and batteries holder with a 3v button cell to reduce the weight, so that it can fly higher. It would also ensure that the Rocket meets the Canadian Model Rocketry Safety Code to remove any metal from the airframe. (http://www.canadianrocketry.org/model_safety_code.php )
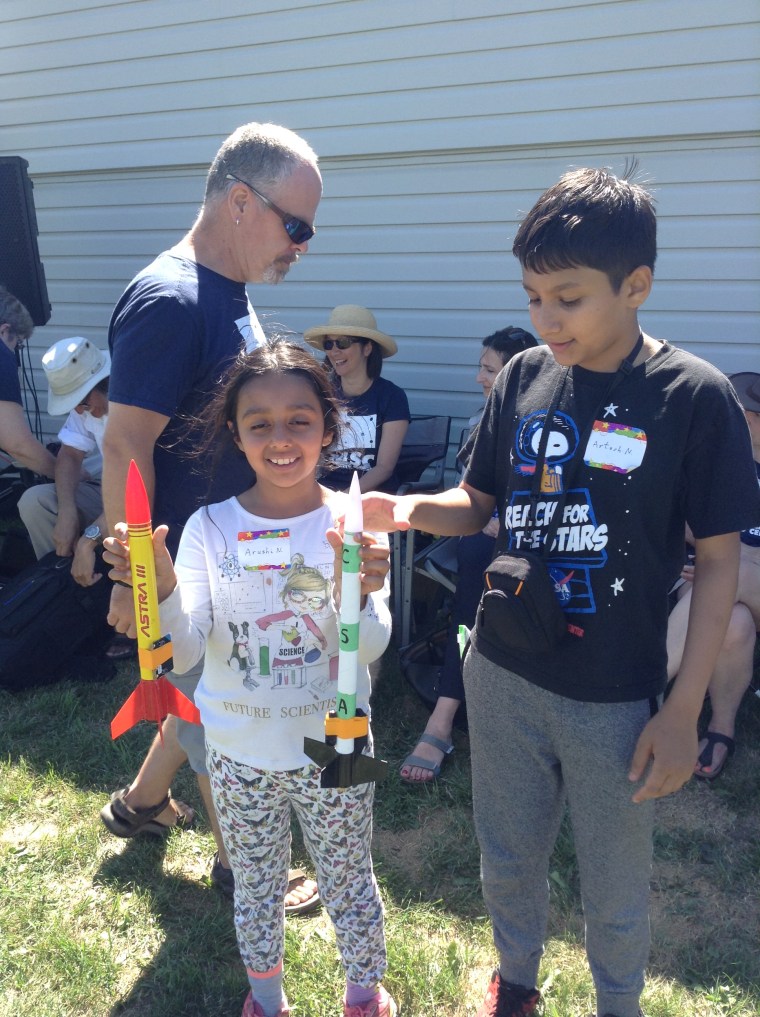
Launch
Our experiment was successful. The rocket with Micro:bit attached to it flew successfully. We got data from the rocket during the launch phase as well as during the descent phase. As the rocket flew higher than 100 meters, we could not get mid flight data as it was out of the range of the micro:bit radio. It would be nice if Micro:bit could have an option for affixing and an external antenna or have another option to increase the radio transmission range.
We are thankful to Kids Code Jeunesse for providing us with micro:bit for frequent training and demonstrations we do for kids as a part of our science outreach activities.

Onboard Flight Video 1
Onboard Flight Video 2